*^C^C_setvar;osmode;0;ucs;object;int;\Break;$M=$(getvar,lastpoint);F;
@$(getvar,userr1)<0;@$(*,2,$(-,0,$(getvar,userr1)))<0;ucs;previous;
Let us have a close look at the macro functionality.
- _setvar;osmode;0;
Disables the running object snap - ucs;object;int;\
Picks an object at an intersection point. The picked point will be stored in the LASTPOINT system variable. Also the UCS will be arranged according to the object so that we can provide the angle 0 for all objects with different angles. - Break;$M=$(getvar,lastpoint);F;@$(getvar,userr1)<0; @$(*,2,$(-,0,$(getvar,userr1)))<0;
At the select object prompt of the break command, we provide the LASTPOINT system variable stored previously. We select the first break point relative to the last picked point (i.e. intersection point) at 0 angle (because the UCS has already been aligned with the object). The second break point is calculated relative to the first break point. The formula used is SBP=(0-FBP)*2 where FPB is the first break point and SBP is second break point. For example, if the value of USERR1 is set to 2 then the first point will be specified as @2<0 and the second point will be @-4<0.
- ucs;previous;
Resets the UCS to previous one.
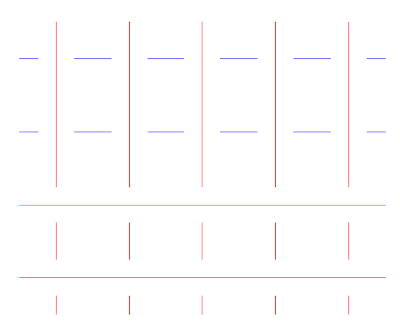
Since we are picking only the intersection point, it is quite unpredictable that which one of the two mutually intersecting entities will get trimmed. One way to overcome this problem is to change the draw order of the entities.For example, suppose you have got a few horizontal as well as vertical intersecting lines. To break the horizontal lines, select all horizontal lines, then go to Tools Menu (or right click) then go to Draw Order and choose 'Bring to Front'. Otherwise the entities will get trimmed according to their draw order. In the following picture, blue lines were placed above the red lines and red lines were placed above the magenta lines.

I hope the LT people will find this macro very helpful. If somebody tries this macro in LT, let us know the result.

No comments:
Post a Comment